My homelab as a developer
This is the last part of my homelab journey, after the unexpected journey and self-host journey. In this post, I want to cover all of my homelab capabilities, which have been very useful to my works as a software developer.
Webserver
I have some contribution to the products at 1dreamm, one of them is JustChill - a mobile platform to meet new people. Its backend was developed using Ruby on Rails, with PostgreSQL, MongoDB, Elasticsearch, Redis as databases, and Amazon S3 as object storage server. They were all hosted on AWS and were getting expensive, so the goal was to use my homelab to share some computing resources. I moved away from AWS for the staging servers, but homelab is clearly not ideal for production use; I had my setup to load balance between AWS and homelab to tackle that.
The first step was to move the master PostgresSQL to my homelab and keep the AWS database as replica. By doing that, I was allowed to remove RDS dependency and scale down the PostgresSQL replica. I had a new Ubuntu Server VM on my PC and named it DatabaseCenter, deployed the master database by following this guide and took advantage of Postgres streaming replication feature. The same strategy was applied to deploy MongoDB to my DatabaseCenter, by following Install MongoDB Community and Convert a Stadalone mongod to Replica Set. I added UPS and battery to my PC to protect the DatabaseServer.
The second step was to clone Elasticsearch and Redis to my homelab. Those services require more RAM so I created another Ubuntu server VM on the Xeon Rig, named it JustChillCenter and deployed Elasticsearch using this guide and this for Redis. The master Ruby on Rails server was also deployed to this VM without problems.
The last step was to connect all those servers together and load balance them. I used Tailscale to connect my homelab servers with AWS servers, it was free and so easy to set up an overlay network. Cloudflare Tunnel helped again to expose the webserver, RESTful API server to the public, and load balance between my homelab and AWS servers with DNS based Cloudflare Tunnel.
The above steps were really time consuming to make a stable enough system for production use, those require some expertise in Software Engineering so I won't go deeper into the details. The key players in my setup were Cloudflare and Tailscale, by using the proxy and overlay network it is secure to expose my services. And flexibility is the key benefit it brings, with this setup I am able to scale up/down my homelab or AWS servers based on the demand with a more reasonable cost. It also allow me to deploy my services to more VPS providers with different geolocations.
GenAI server
Another 1dreamm product is FlashChat - a GPT chat app and tools to learn new languages, it integrated with OpenAI API to provide the chat completion service. The product usecase was very minimal and OpenAI integration seemed overkill, I took advantage of the opensource Large Language Models and move the chat completion service to my homelab.
The release of Meta llama 3.2 was a game changer for me, its Llama-3.2-3B-Instruct model can be hosted with 8GB VRAM and it is smart enough for FlashChat usecase. Also, vLLM was a great library to handle LLM inference and serving, its OpenAI-compatible API server was really helpful, I migrated from OpenAI API to vLLM API without problems.
With these tools at hand, I took advantage of the RTX 3070ti GPU from my PC and a vLLM server was built up using Docker Desktop with this guide. The chat service was fast and good enough to handle chat completion requests, and Cloudflare Tunnel helped to expose this service for app integration.
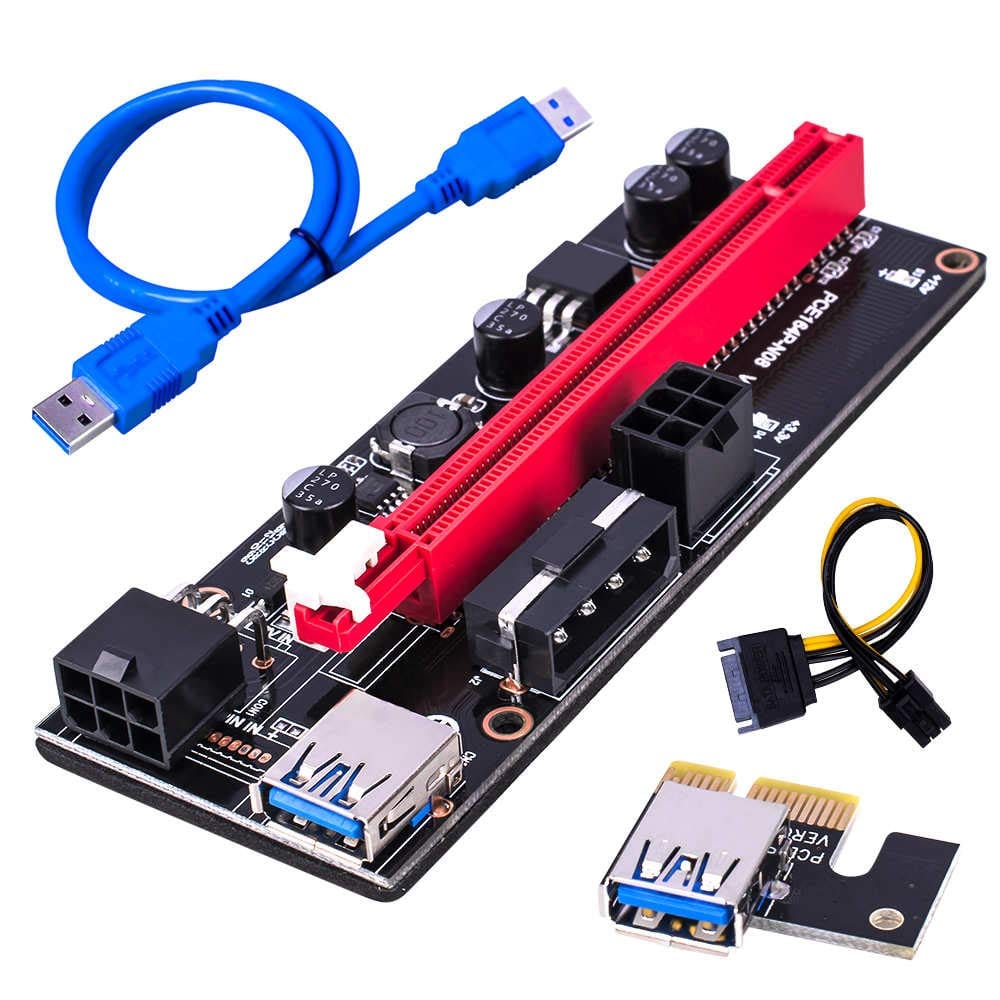
The last key component of my setup was the PCIE riser, this item is very popular among crypto miners to connect multiple GPUs through the PCIE 1x lanes. With this riser, I could scale up the number of vLLM instances by just adding more GPUs to the mainboard with no performance tradeoffs.
A problem came up, I had to use Docker Desktop with WSL on Windows to run these vLLM instances because I was unable to passthrough GPU to my Ubuntu VMs. Hyper-V was not so optimized for this purpose and a quick research led me to Proxmox, which was a better choice for Hypervisor and easier to scale up my lab.
Cluster Setup
So, my lab was proved to be capable of production uses, I upgraded my PC to 32GB RAM, the Xeon Rig to 128GB RAM, added 3 more rigs and a couple of GPUs for the purpose of redundancy and resilience.
Proxmox was easier to manage the new Virtual Machines; the installations steps were straightforward, Proxmox WebUI was easy to use and create a Virtual Machine was similar to Hyper-V. A problem with Proxmox was whenever I add a new PCIE device, its network interfaces messed up and caused me unable to connect with its static IP. Edit /etc/network/interfaces was the key part to resolve the network issue.
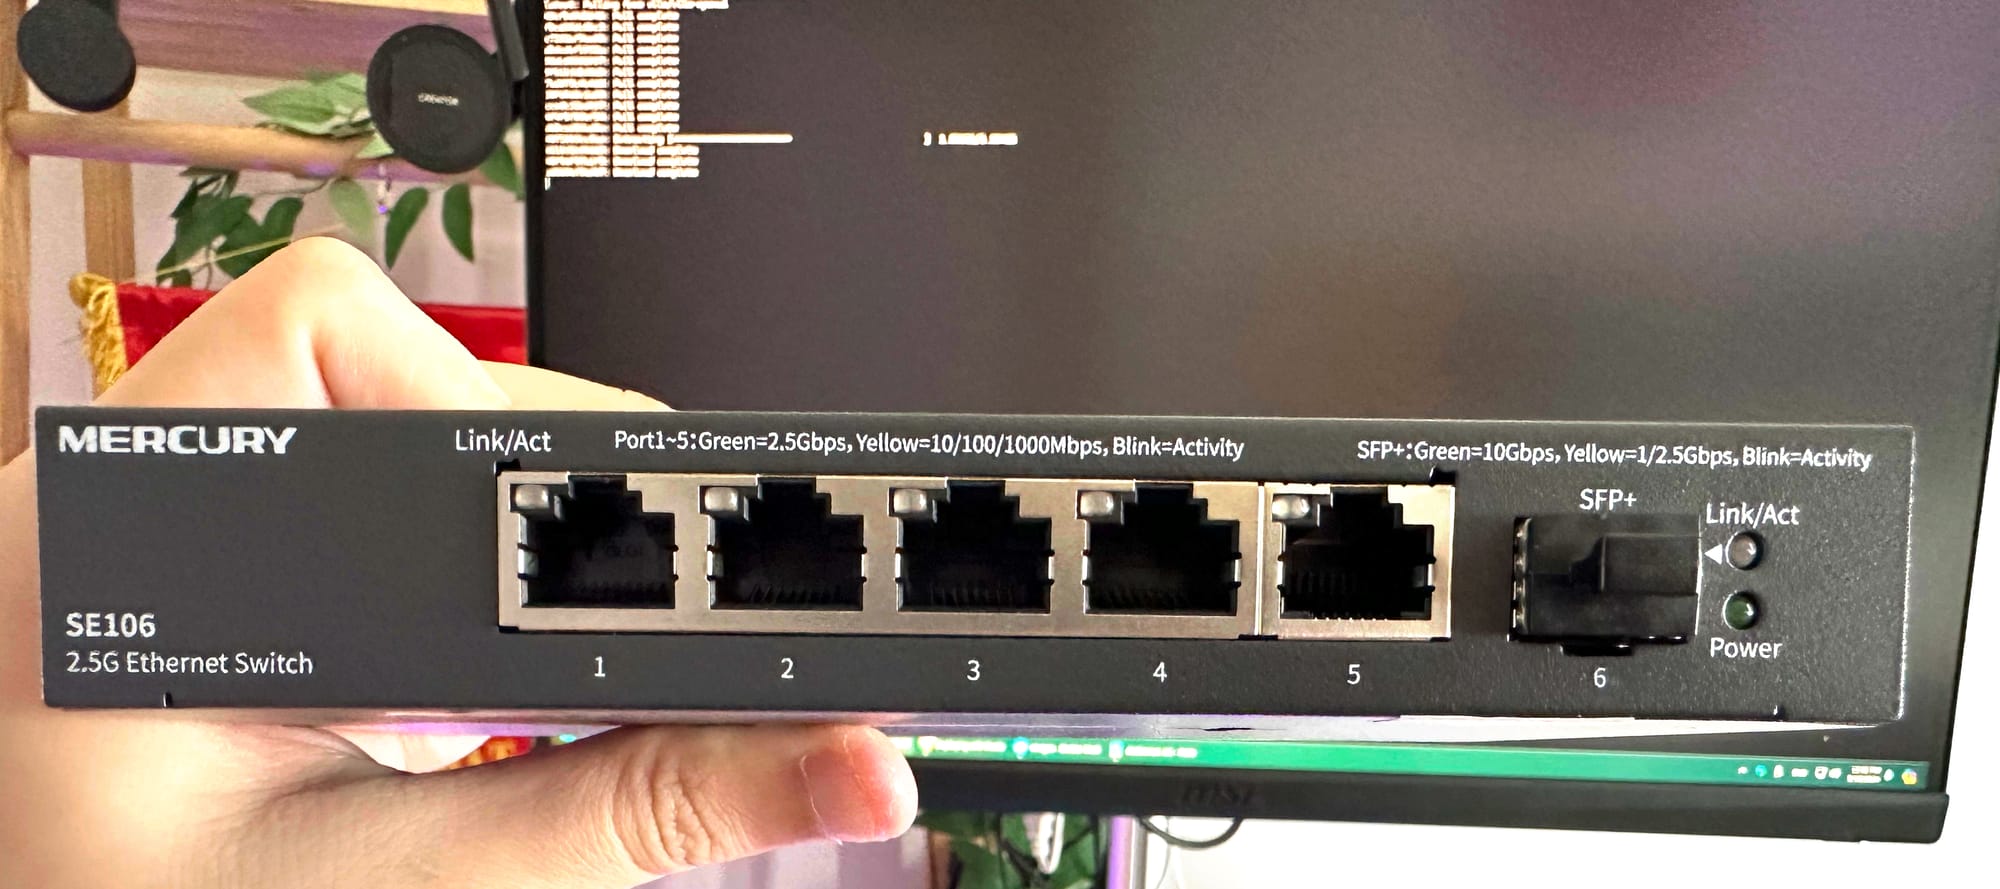
pfSense: my internet router was inefficient to provide routing and firewall for my new rigs and VMs, I needed an Enterprise solution and pfSense was the standout opensource option. I followed this guide to set up pfSense as a Hyper-V VM and create a new isolated subnet for my lab. There are many useful packages that can be installed within pfSense, I use acme to manage LetsEncrypt certificates and haproxy to provide Reverse Proxy and Load Balancer for my lab, tailscale can also be installed as a package. This part was really struggling and these two tutorials were extremely useful for me: How To Guide For HAProxy and Let's Encrypt on pfSense: Detailed Steps for Setting Up Reverse Proxy and pfsense + HAProxy + Let's Encrypt Howto. A network switch was also needed to work with pfSense.
Kubernetes: with the new infrastructure, a container orchestration was irresistible in my setup. Some people may see k8s as an overkill but I do enjoy the benefits it brings, the key practice is to just deploy the services that scale. I had JustChill RESTful api server and soketi websocket server deployed on Kubernetes, database services stayed fixed on Ubuntu. Kubernetes was so tough to set up, I followed this guide to deploy a master node and 10 worker nodes, the master node kept failing at api server healthy check and costed me hours to resolve. This kubeadm command finally worked for me sudo kubeadm init --control-plane-endpoint=kube-master-node --pod-network-cidr=10.234.0.0/16 --service-cidr=10.10.0.0/24 --service-dns-domain=dcs.vmh.local --upload-certs, the cidr was needed.
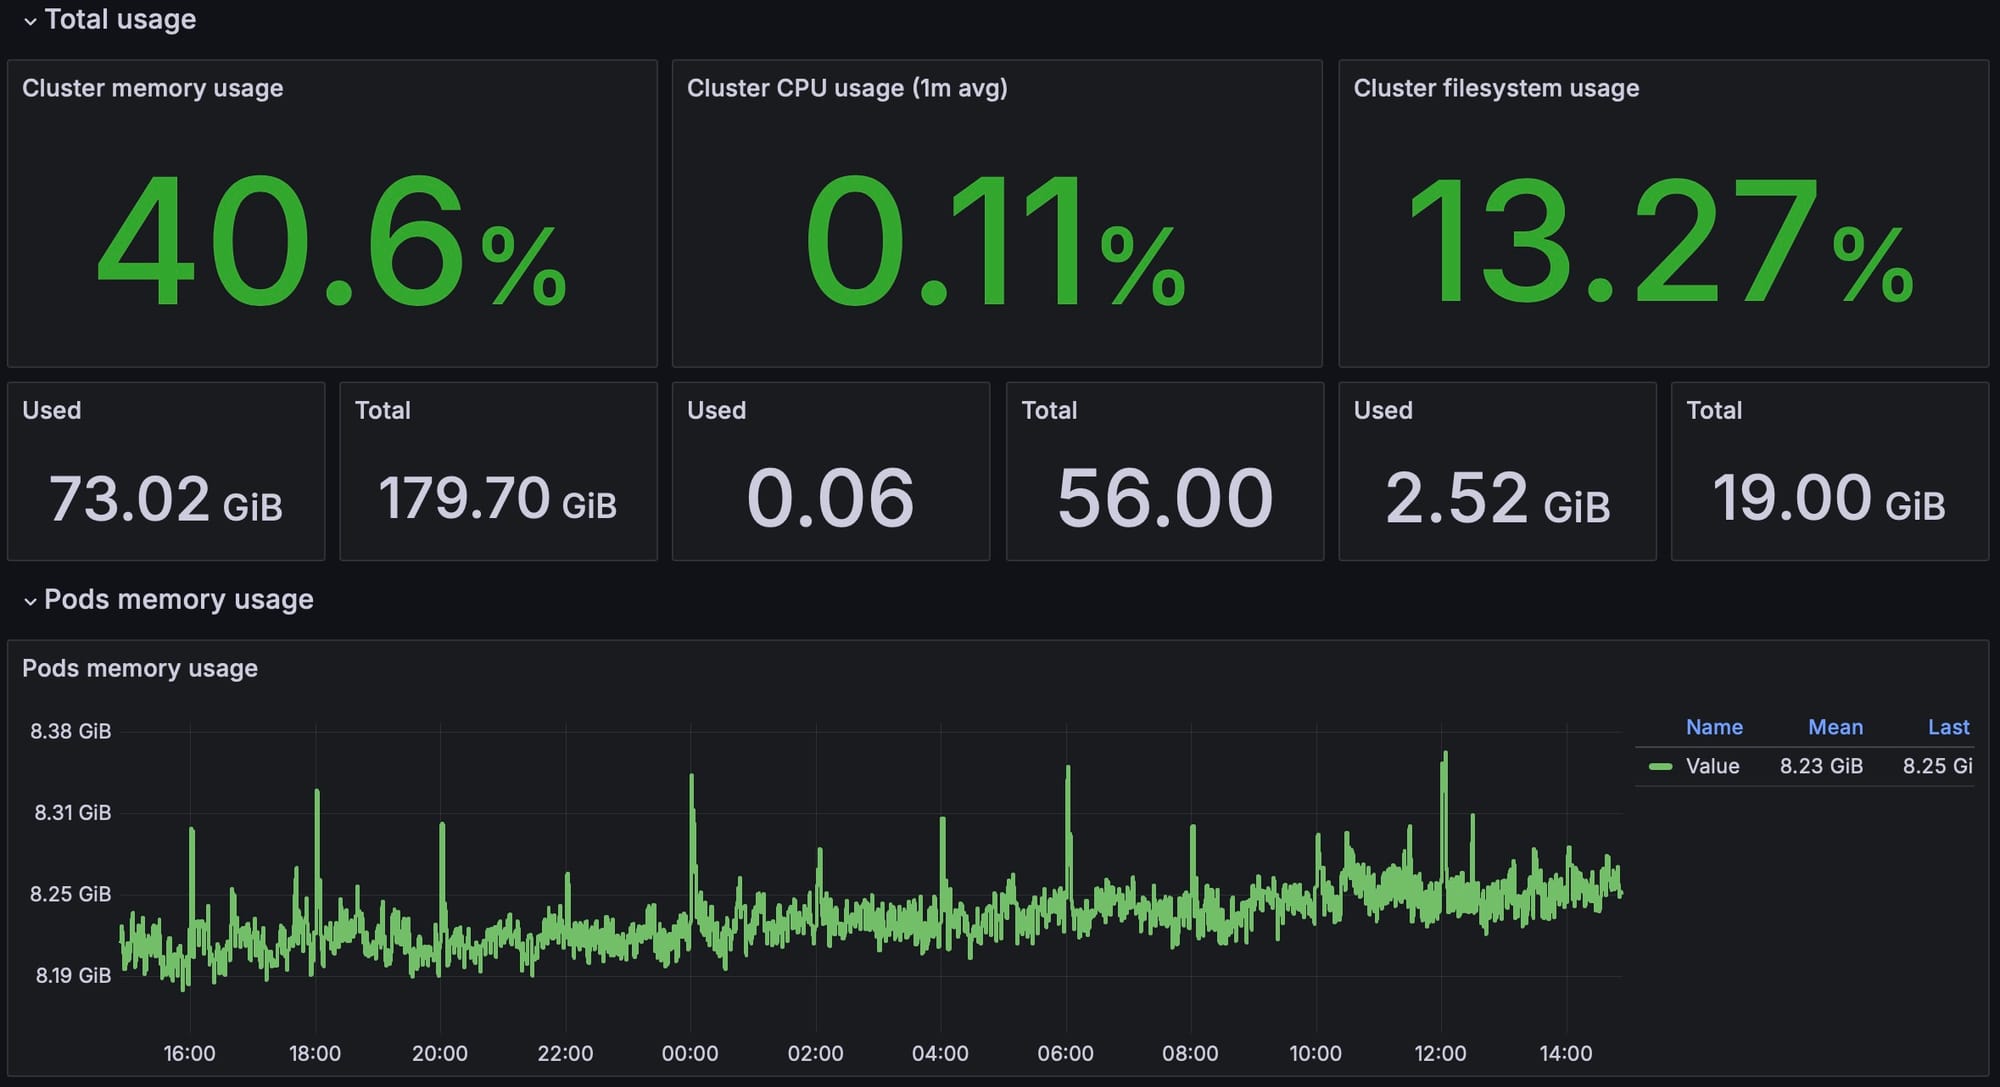
Some useful tools to work with k8s: k9s, Democratic CSI, Prometheus and Grafana, Fluent Bit, Graylog.
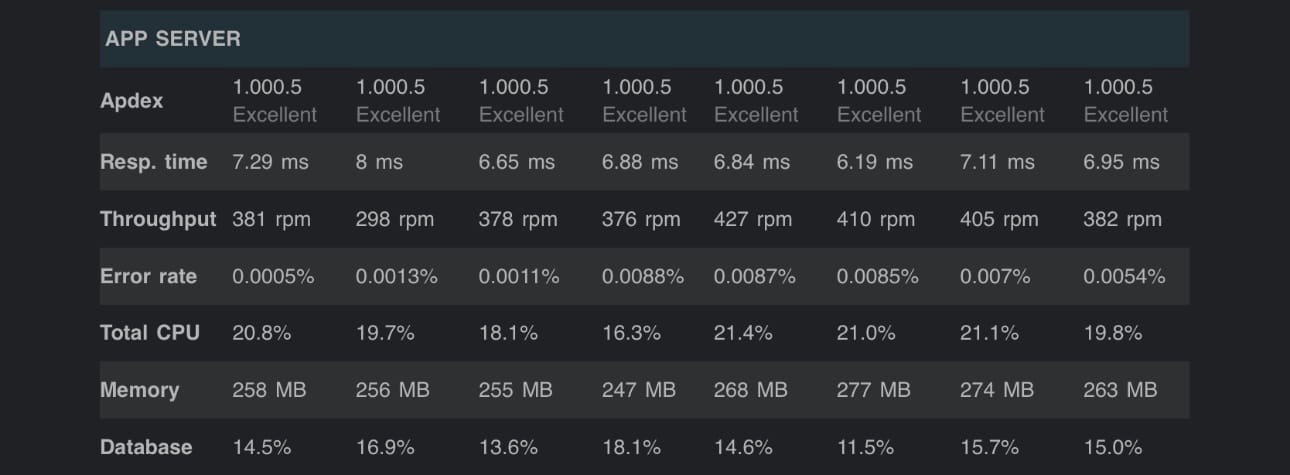
With this infra, I got my PostgreSQL, Elasticsearch, MongoDB, vLLM scaled to 3 replicas each and connected to more than 10 backend instances, which provides enough redundancy for 1dreamm products.
The End
This is the final post of my homelab journey, the series have covered the key parts of my last 6 months work. I had alot of struggles but most of this journey was filled with fun, satisfaction and lessions. There are many details that could not be covered but we will have chances to go back to this in my future posts.